yolov8를 이용한 object detection 예제
1. YOLOv8 설치
!pip install ultralytics
- 주피터노트북에서 실행할 경우 프로그래스바를 실행하기 위해서 다음을 설치한다. (필수는 아님)
pip install ipywidgets
or conda install -y -c conda-forge ipywidgets
2. 추론(predict)
2-1. CLI (command line interface)에서 터미널 명령어로 추론/평가/학습을 진행
2-2. Python lib 를 이용해 코드상에 원하는 추론/평가/학습을 진행
2-1. CLI (command line interface)
1. 모델 로딩
- Ultralytics에서 제공하는 Pretrained Model이나 직접 학습시킨 모델을 이용해 추론한다.
- Ultralytics는 Object Detection을 위한 Pretrained 모델을 제공한다.
- Object Detection 모델은 COCO dataset으로 학습되었다.
- 모델 명을 지정하면 자동으로 다운로드를 받는다.
2. CLI
yolo task=detect mode=predict model=model_path source=추론할_image_path
명령프롬프트 실행
: cd [yolo가 다운로드 된 파일 디렉토리]
-> conda activate torch
-> yolo (yolo 실행)
-> CLI 명령어
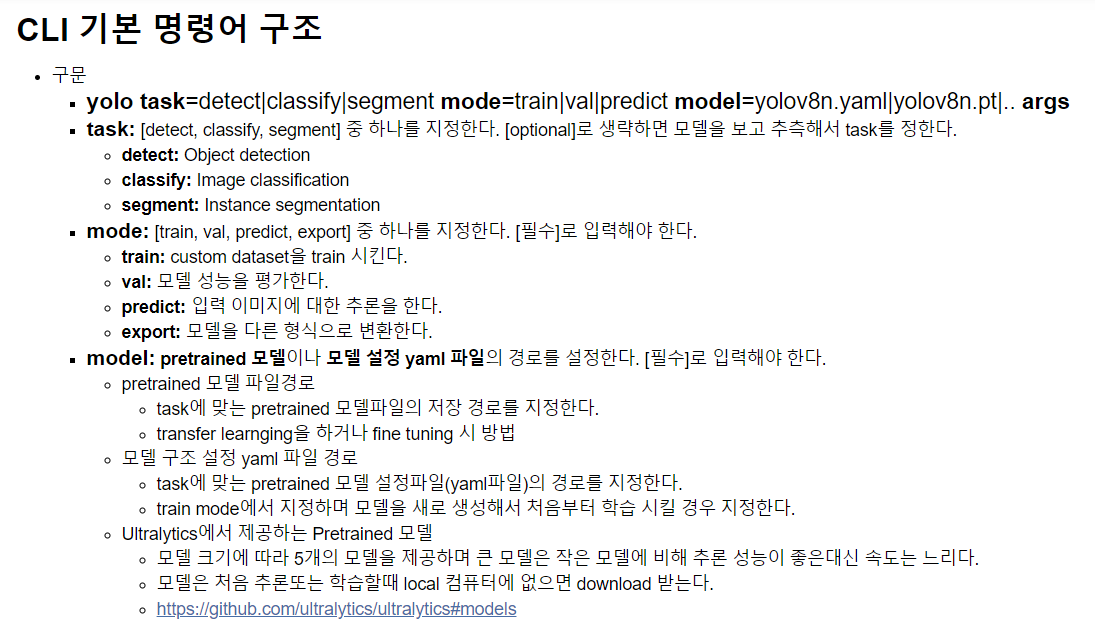
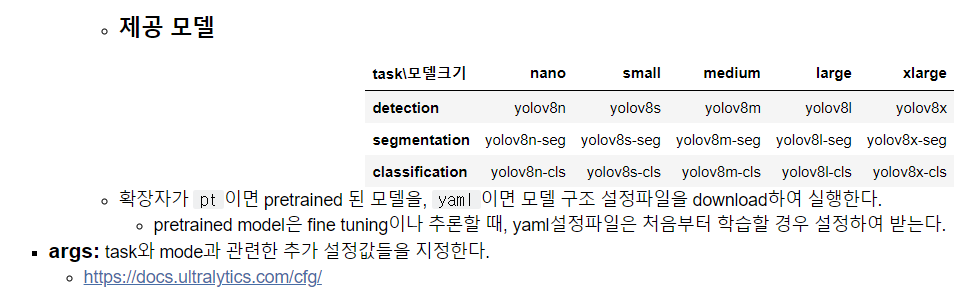
- CLI 명령어 구조
: yolo task=detect|classify|segment mode=train|val|predict model=yolov8n.yaml|yolov8n.pt|.. arg
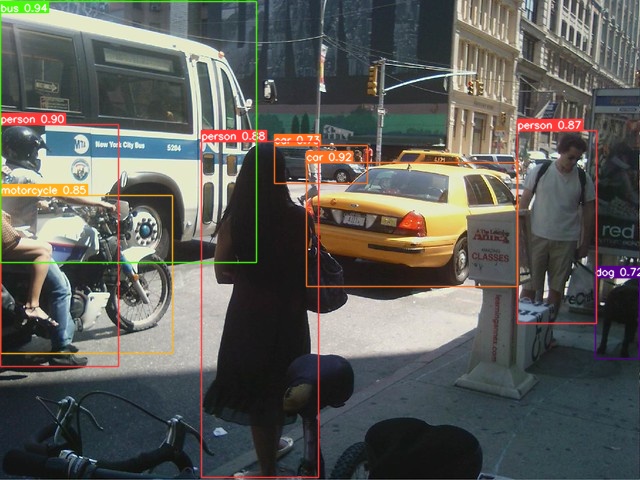
이미지파일 예제
#이미지파일예제
yolo task=detect mode=predict model=models/yolov8s.pt source =01_test_image/1.jpg save = True  save_txt= True line_width = 1 conf=0.7
# 위 예제 설명
yolo task=detect #어떤 작업을 할지
mode=predict # 그 작업안에서 어떤 일을 할지
model=models/yolov8s.pt # fine tuning 시 사용할 모델
#옵션
source =01_test_image/1.jpg # mode = predict에서 추론할 대상 경로
save = True #결과를 표현한 이미지 저장 여부
save_txt= True # 결과 라벨파일 저장 여부
line_width = 1 # bounding box(bbox) 선 굵기
conf=0.7 #confidence threshold(c_score 가 지정한 값 이상인 것만)
결과 : runs 폴더 > detect > predict - 1.jpg파일과 labels폴더 생성
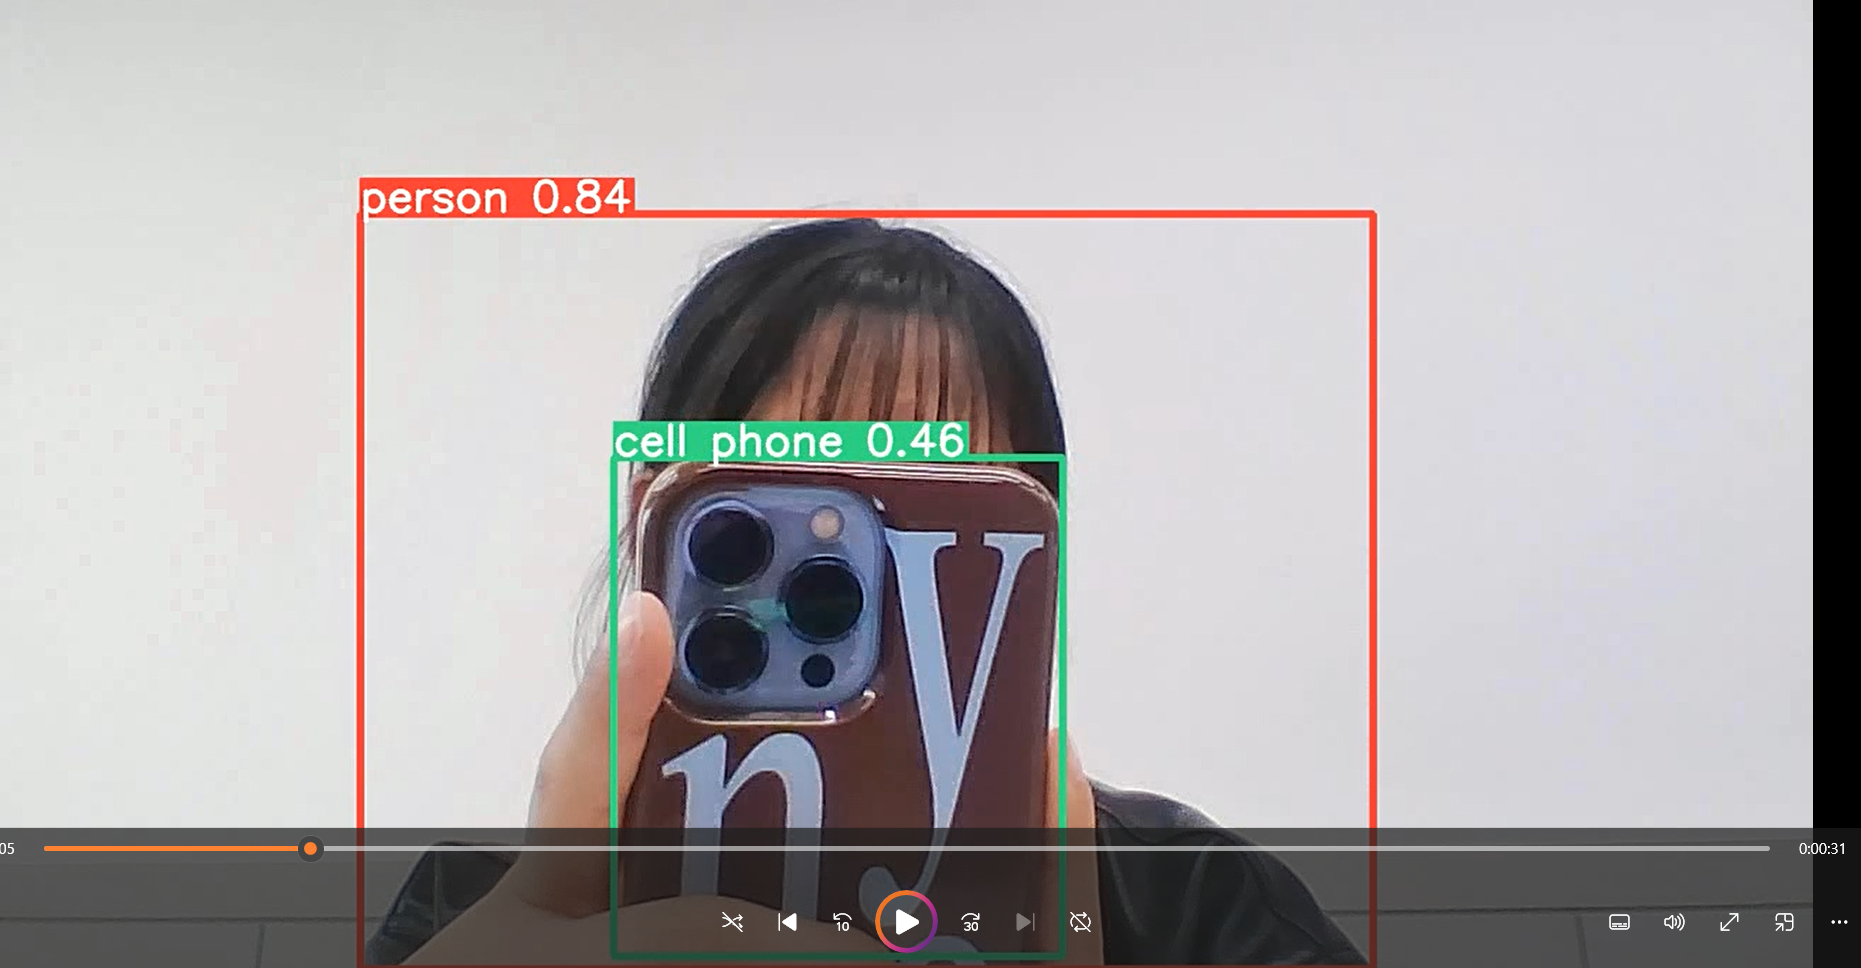
동영상촬영 예제
#동영상 촬영 예제
yolo task=detect mode=predict model=models/yolov8s.pt source=0 save = True show= True
# 위 예제 설명
yolo task=detect mode=predict model=models/yolov8s.pt
source=0 # 정수 - web cam id
save = True show= True
# 종료 시 명령 프롬프트 화면에서 ctl+ c결과 : runs 폴더 > detect > predict2 - 0.avi파일 생성
2-2. Python lib 를 이용해 코드상에 원하는 추론/평가/학습을 진행
import
import ultralytics
from ultralytics import YOLO #모델 클래스

ultralytics.__version__
1. 이미지 파일 추론
모델 생성 + 추론
# 모델 생성
model = YOLO("model/yolov8n.pt")#객체 생성시 pretrained 모델파일의 경로를 지정.(없으면 다운로드)
                              # task => 설정한 모델 파일에 따라서 결정.

# 추론
image_path = "01_test_image/1.jpg"
results = model(image_path) # 추론 -> 필요한 설정들을 파라미터로 지정
- 추론 결과 result에 저장
print(type(results)) # 추론한 사진별로 결과를 따로 생성한 뒤에 리스트로 묶어준다
print(len(results))
print(type(results[0]))# 첫번째 이미지에 결과
- 결과 확인
import matplotlib.pyplot as plt
import cv2

plt.imshow(results[0].plot()) # 원본이미지에 추론 결과를 표시한 결과 이미지르 반환( ndarray : )
plt.show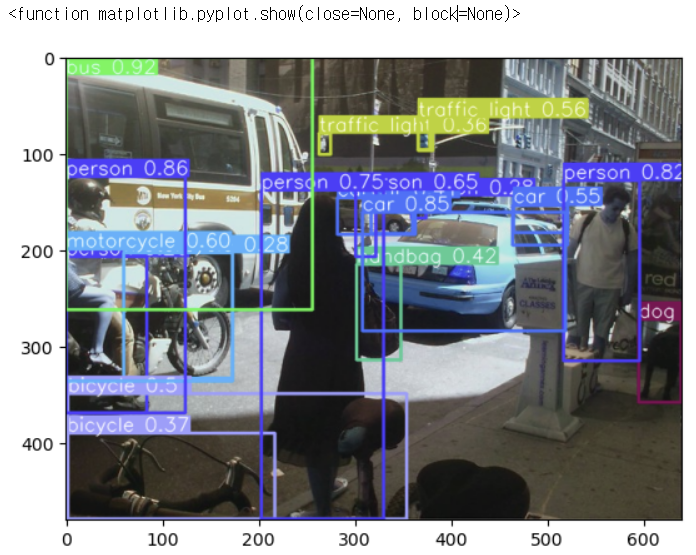
- 추론결과 저장
save = True
r= model(image_path, save=True, save_txt=True , conf =0.7) # 결과저장 경로까지 반환 runs\detect\predict4
2. 웹 이미지 추론 - url지정
# web상 이미지 추론 -> url지정 .
url = "https://i.namu.wiki/i/JNKvslt1j4AioYDmWSiZdcJBzwWD2-XibS8JYqMiQcSpF5GSUzYHVdVBsSOPElngPI5CfiAUf0oM3bXXzFr30w.webp"
r = model(url, save = True)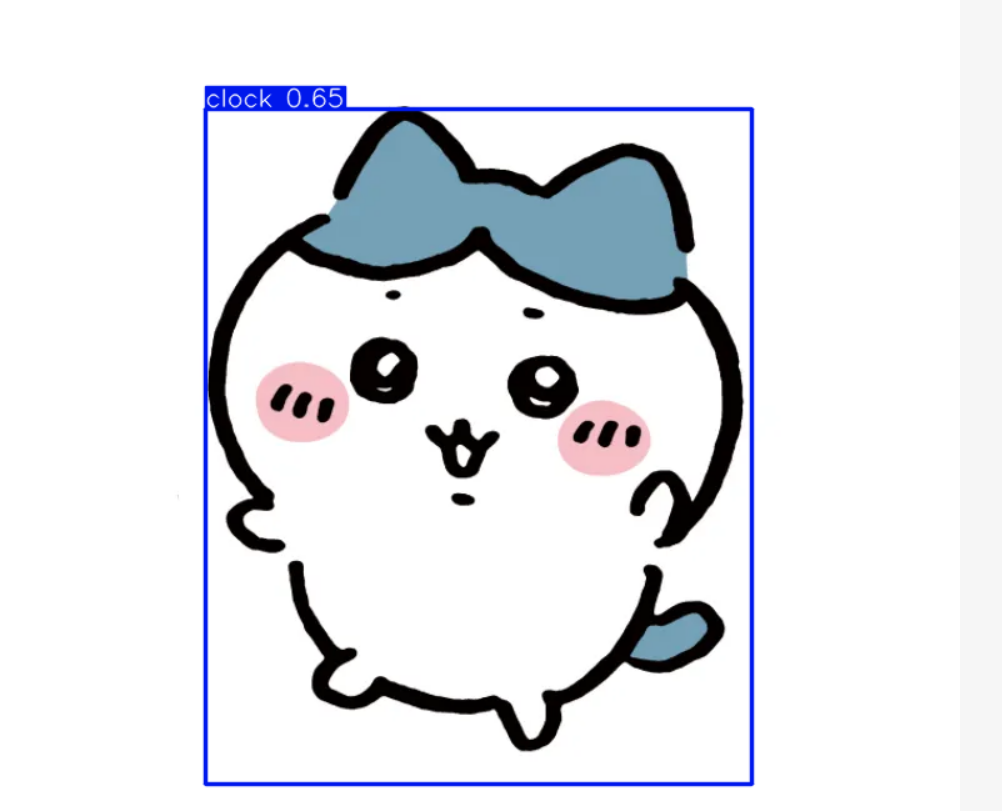
3. 한번에 여러장 추론
- 추론할 파일 경로를 리스트로 묶어서 추론 - 추론성능이 좋지않은 경우 생김
glob로 파일 경로 묶기
from glob import glob
img_list = glob("01_test_image/*.jpg") + ["02_test_image/banana.jpg"]
img_list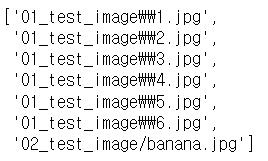
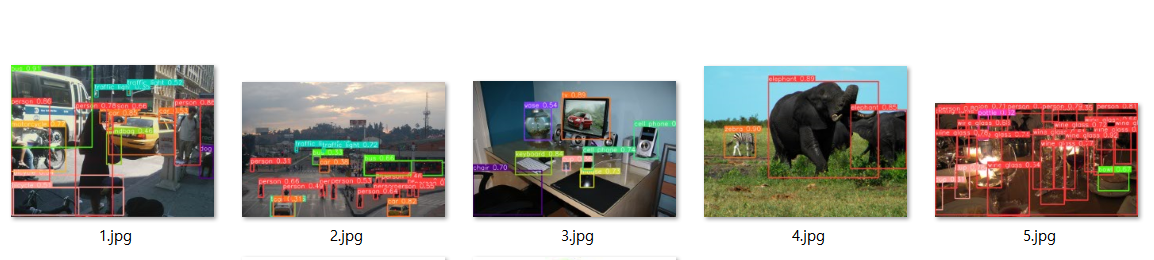
추론
r = model(img_list, save = True)runs\detect\predict4 폴더로 이동하면 저장된 파일 확인가능
4. 동영상 추론
- source에 동영상 파일 경로를 지정
- frame 단위로 추론
Import + 모델정의
위에서 했지만 한번 더 추가해서 흐름익혀
#모델 import

import ultralytics
from ultralytics import YOLO #모델 클래스

ultralytics.__version__

#모델 정의

model = YOLO("models/yolov8n.pt")
동영상 추론
show = True 이므로 동영상에 detection이 적용된 화면이 뜬다(cmd > ctrl+c 혹은 kernel을 종료해야 꺼짐)
r = model("01_test_image/indo_stcreet.mp4",save = True, show=True)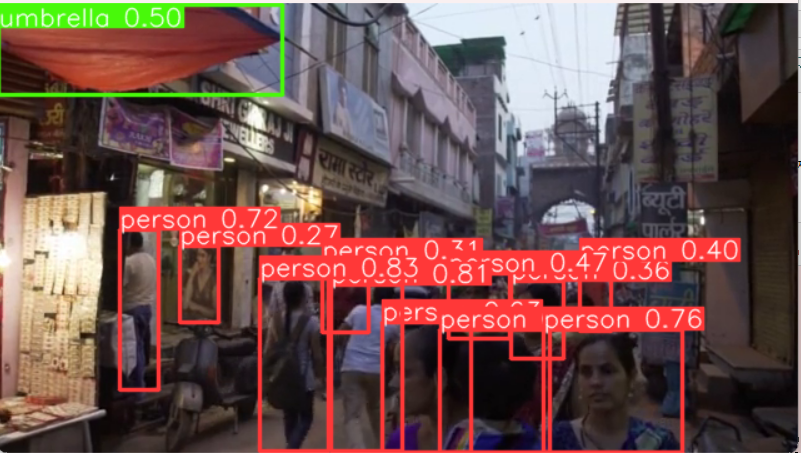
프레임의 개수는 350개가 확인되었다.
위의 코드를 실행하면 350개의 프레임에 대한 detection이 감지된다.
len(r) # 350 -> frame
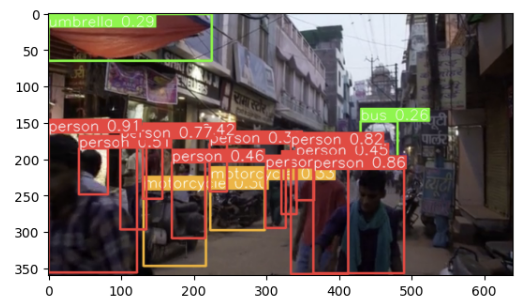
마지막 프레임의 결과 확인
- r[-1].plot()[:,:,:,::-1]
# 마지막 프레임의 결과 확인
plt.imshow(r[-1].plot()[:,:,::-1]);
# [:,:,::-1]: 이 부분은 이미지의 색상 채널을 반전시키는 역할
# 이미지의 색상 채널은 보통 Red (빨강)<Green (초록)< Blue (파랑) 순서로 배열
모델에 정수를 넣으면 웹캠이 열린다.
웸캠도 종료하려면 cmd → ctrl+C
# r = model(0, #정수: 웹캠 id
#          show = True)
3. 추론 결과 조회 - 속성과 추가정보 조회
1. 모델의 추론결과는 list에 담김 => Results에 담아서 반환
- Results : 임지 하나에 대한 추론 결과를 담는 객체
2. Results.속성 으로 result에 담긴 추론결과를 조회
- 추론 종류에 따른 속성
- Detection: result.boxes - Boxes type
- Segmentation: result.masks - Masks type
- Classification: result.probs - torch.Tensor type
- Pose estimator: result.keypoints - Keypoints type - 추가 정보
- Results.orig_img: 추론한 원본 이미지
- Results.orig_shape: 추론한 원본 이미지의 크기 (height, width)
- Results.path: 추론한 원본이미지의 경로
- Results.names: class2classname 정의한 딕셔너리 (key: 클래스, name: 클래스 이름)
이미지지정
print('총 이미지수:', len(result_list))
result = result_list[0] # 첫번째 이미지에 대한 결과
정보조회
print('원본이미지 경로:', result.path)
print('원본이미지 size:', result.orig_shape)
print('원본이미지 :', type(result.orig_img), result.orig_img_dtype)
class
#class
from pprint import pprint
pprint(result.names)
Objext detection 결과값 조회
: Boxes로 반환한다.
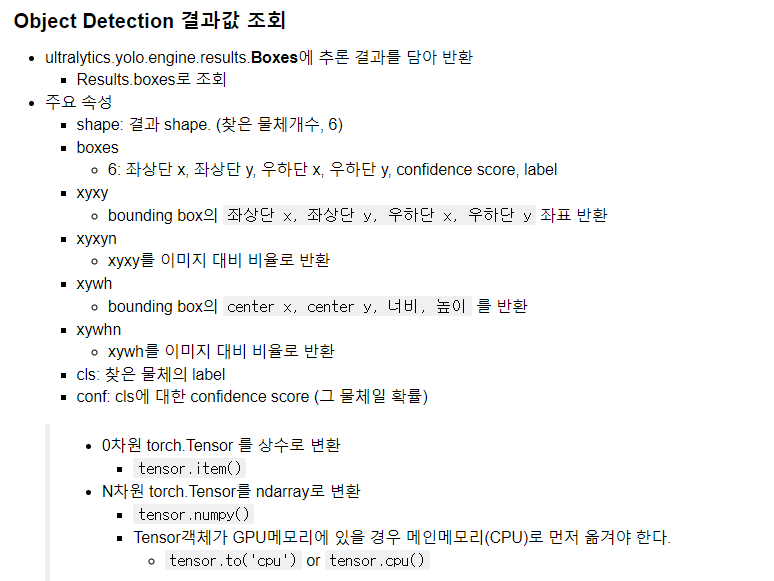
Object Detection결과를 다음 ->bbox 위치 + object class
# result_list[0]
boxes = result.boxes
print(type(boxes)) # Object Detection결과를 다음 ->bbox 위치 + object class
찾은 object의 정보
# 찾은 object 정보
print(boxes.cls.shape) #boxes.cls : ㅐobiect의 class(index) => [8] => 찾은 object가 8개, 8개 class
boxes.cls
for c, p in zip(boxes.cls,boxes.conf ):
    pirnt(f"{c} - {result.names[c.item()]}, {p*100:.3f}%")
찾은 object의 class 확률
print(boxes.conf.shape) # 찾은 object의 class 확률
boxes.conf
bbox의 위치
# bbox 위치
print(boxes.xyxy, boxes.xyxy.shape, sep ='\n') #shape: [8: 찾은 object의 개수, 4: 좌표(좌상단 xy, 우하단 xy)]

# 출력결과
# [바운딩 박스 좌표 데이터] -> 나중에 변환해야함
# (바운딩 박스 좌표 데이터의 형태 정보)


print(boxes.xyxyn, boxes.xyxy.shape, sep ='\n') #xyxyn=> o~1사이로 noramlize(정규화) -> 이미지 크기 대비 비율.
# bbox 위치 - xyxyh :conter x y 좌표,bbox의 너비 ,높이
print(bbox.xywh, bexes.xywh.shape, sep = '\n')
print(bbox.xywhn, bexes.xywh.shape, sep = '\n') #xywhn -> noramlinze(이미지 크기 대비 비율)
원본이미지에 bbox치고 class 출력
# 원본 이미지에 bbox를 치고 class를 출력
import cv2
from ultralytics import YOLO

#1. 모델 생성
model = YOLO("models/yolo8n.pt")
#2 추론
result_list = model("01_test_image/1.jpg")

#3. 추론 결과를 이용한 추가 작업 ==> bbox를 그리기

result = result_list[0]

# 원본이미지를 복사
org_img = result.orig_img
img = org_img.copy()

# bbox 추론결과를 조회
boxes = result.boxes
xyxy_list = boxes.xyxy # 좌상단, 우하단 좌표(bbox위치)
cls_list = boxes.cls # class index
conf_list = boxes.conf # class 확률


# tensor -> ndarray변환시 -> CPU로 이동 시킨 후 변환가능
for xyxy, cls, conf in zip(xyxy_list, cls_list, conf_list):
    pt1 = xyxy[:2].to("cpu").numpy().astype("int32") # 좌상단 좌표
    pt1 = xyxy[2:].to("cpu").numpy().astype("int32") # 우하단 좌표
    cls_name = result.names[cls.item()]
    txt = f"{cls_name} - {conf.item()*100:.2f}%"

#     image에 bbox
    cv2.rectangle(img, pt1 = pt1, pt2 = pt2, color(255,255,255), thickness =1)
    #label text
    cv2.putText(img, text = txt, org=pt1, fontFace= cv2.FONT_HERSHEY_COMPLEX, fontScale = 0.5,
               color=(225,225,225), thinckness =1, lineType=cv2.LINE_AA)

###img 출력
cv2.imshow("result", img)
cv2.waitKey()
cv2.destroyAllWindows()'■ Data Science Lab > ML & DL' 카테고리의 다른 글
| Segemntation | 개요 (1) | 2023.11.09 |
|---|---|
| Object Detection | yolov8 예제 2(customdataset_train.) (0) | 2023.11.09 |
| Object Detection | YOLO 모델의 구조 (0) | 2023.11.07 |
| Object Detection | 개요 + 성능평가 (0) | 2023.11.07 |
| 데이터 수집과 라벨링 | Open Dataset + 데이터 수집 방법 (0) | 2023.11.06 |


